Monday, 9 November 2009

Sanding the floors, tiler tiling 1st floor bathroom and moving in!!!

August 23-25th, 2009

below: Antonio covering newly sanded floor before we move in.
location: second bedroom

below: floor sample

below: We have moved in!! Boxes, boxes and more boxes...

below: Before & after floorboards
below: Antonio hard at work sanding the floorboards before our moving in date!

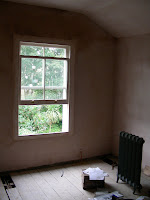
below: sanded floorboards in second bedroom, 1st floor


below: Reception room new bay sash windows!!!
below: Look down at Mezzanine level - new stud walls for bedroom and bathroom

below:
second bedroom new sash windows and dry plastered walls

below: bedroom - laying floorboards and repairing the damaged before our move in date


August 21, 2009 - new window openings and fresh plaster

So, this entry is about the events which took place the week before we moved into the house to live onsite at the end of August 2009. Because I am writing this in retrospect, please excuse any grammatical errors concerning use of tenses.

It all seems like ages ago (writing this on Nov. 9, 2009).

Getting the top floor of the house "liveable" (and I use this term loosely) seemed like it took Herculean efforts on both our parts to push for this to occur because of our gigantic problems with the build/renovations. At the beginning of August, I was on site every single day of the week project managing while Antonio was working all day. On weekends, we were both regularly "mucking in" like labourers with the guys to get the top floor ready and the basics on site for us to survive. Again, real "basics" seem like 5 star luxuries to what we had for the first couple of weeks. The photos tell their own story too. I hope you enjoy!

Photos below: before & after photos
1st floor bathroom - (top) new window opening & plaster boarded ceiling (green means moisture resistant)
(bottom) - plaster skimmed ceiling & hardibacker boards installed on wall
below:
1st floor - (left) final push to get my insulation (orange sacks) put in before the plasterboards were screwed into place. Pink plasterboards are 1 hour fire resistant (according to UK law all staircase areas must be pink plasterboard for purposes of timing & escape from fire).
(photo to right) after photo

photo below:
Master bedroom - drying plaster
below: Second bedroom - fresh plaster

Photos below: 1st floor second bedroom
(left) - before photo (water damaged wall)
(second & third) - after photos


1st floor:
Bedroom 3 - plastered and skimmed

1st floor: Bedroom 3, freshly plastered


below:
Master bedroom was white washed by Antonio and Marco (Reda!) over the weekend prior to our move.

below:
All windows were installed by August 23rd, including the large bay windows.
Mezzanine level - Bedroom 4 - new bay windows installed.

Photos & dates to bring the blog up-to-date

Photos below: August 19th, 2009 - Ground Floor & entrance hallway - new joists with ply floor laid. All walls removed and original plaster ceilings demolished and rubble removed.


Below: First floor - new insulation & plaster boarding
top - (from hallway looking into Master bedroom) New insulation (I did that myself - super itchy job!)
bottom - Second bedroom (looking from inside the bedroom into hallway & Master bedroom door)

below: 1st floor - Insulation
Photo top: 1st floor landing & corridor (looking into bathroom and down into bedroom 3)
Photo bottom: 1st floor bathroom

Photo below: 1st floor - 3rd bedroom --> new insulation & plaster boards

Photos below: August 20th, 2009
Photo top: Master bedroom stripped of original floorboards
Photo bottom: 1st floor 2nd bedroom new plaster boarded ceiling
Photos below: new plasterboards
Photo top: looking at 1st floor landing & Master bedroom entrance (centre right) & 2nd bedroom (left)
Photo bottom: looking into 1st floor 3rd bedroom & bathroom to the right


Mezzanine level - Guest bedroom 1 (at the time of the photo is served well as a storage room)

Photos below: August 21st, 2009
1st Floor Master bedroom: New plaster!!!!!!!!
That's Wayne, one of our amazing plasterers! He can turn plaster into a mirror of glass!!

Photos below:
top: 1st floor landing - plasterboarding the bathroom and bonding the wall to the right in preparation for plaster and skim.
bottom: Carpenter beginning to open the original window in the 1st floor bathroom.


Mezzanine level: Opening of new window in Mezz. bathroom (left)
Looking left, note the green poles (acros), they were used to support joists we opened on of the original windows. This window is directly below the 1st floor window (photo above). This area to the left is to become the Mezzanine level bathroom.


Photos below: August 21st, 2009
1st floor Master bedroom
top photo: Master bedroom
bottom photo: Second bedroom (water damaged wall & blown brickwork)

below: Mezzanine bedroom and right side is the soon-to-become new bathroom